Backing up your WordPress installation, much like backing up your files or saving your documents, is a process that is often neglected. However, there are many cases that you will be happy to have a backup to roll back to:
- A corrupt database.
- A malicious attack to your web server.
- A WordPress upgrade that went wrong.
- A faulty theme or plugin, or an attempt to install a theme or plugin from a faulty file.
Having a recent backup, however, is not necessary only for emergency situations. Consider a case that you need to move your existing WordPress site to a new host. Cloning the most recent version of your WordPress installation is a very safe way to transfer all your posts, pages, media, as well as your themes, plugins, configurations and all your settings.
There are many cases that it is absolutely necessary to create your backup manually; accessing your web server via FTP or SSH, downloading your wp-content directory and logging in your MySQL installation to export your database tables and records might be the only way you have to bring your site back to life.
However, in this article we are going to present a simpler method. We are going to assume that you have not lost access to your Dashboard; in fact, we are going to assume that your WordPress site works perfectly well, without any problems. That’s, after all, the best moment to back up your installation. We are going to use a plugin to export every theme, every setting and every post, page and comment into a file, as well as how to use this file to replicate your WordPress site.
All-in-One WP Migration

The plugin we are going to use is the All-in-One WP Migration. It is a free and open-source plugin, very actively developed by Yani Iliev and the Servmask team and with an extensive documentation. It is a plugin that boasts to be compatible with any PHP hosting provider, as it does not requite any extension, that has been tested with a big number of popular WP providers and has been reported to be compatible with even more and that has been consistently updated to support every WP version release since WP version 3.3.
Things to keep in mind before using the plugin
- Like most backup plugins,
All-in-One WP Migrationcan cause problems when used in a site with active security or caching plugins. It is recommended that you deactivate your security and caching plugins before using it. The Servmask Knowledge Base has a full list of plugins incompatible withAll-in-One WP Migration. - To backup your website from a backup file, you need to have a working WordPress installation and the
All-in-One WP Migrationinstalled. That is, if you are migrating to a new server, you have to first install the latest WordPress version and theAll-in-One WP Migrationplugin and then import your backup. - Using a backup file will override all of your current content, themes, plugins and customizations and replace them with your backed up files.
Getting started
After installing All-in-One WP Migration (and provided you took in account the aforementioned list of incompatible plugins and made sure to deactivate them before proceeding), we are ready to export all of our data to a file and save it locally.
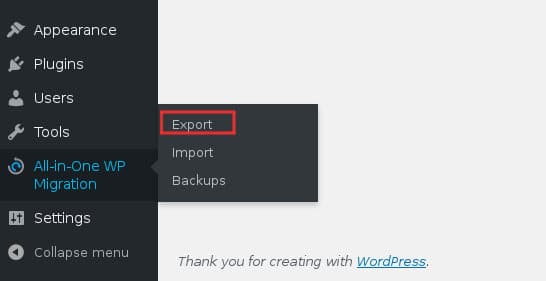
In our dashboard, we choose Export from the All-in-One WP Migration menu entry. This takes us to the export options page:
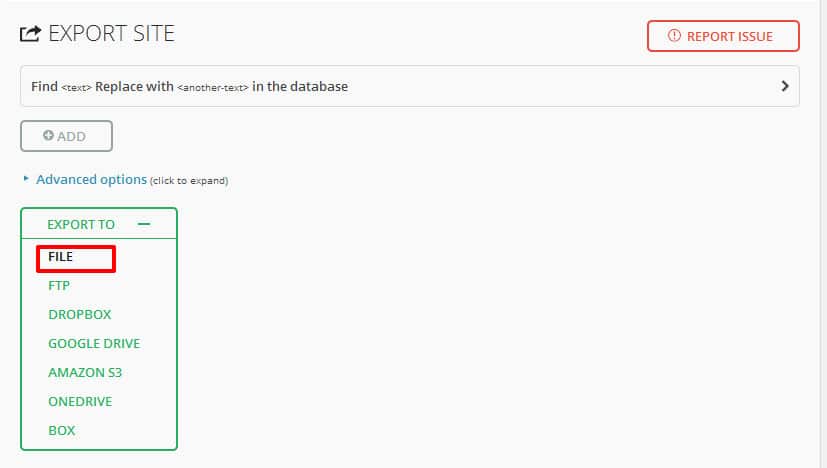
Here we want to expand the “EXPORT TO” drop-down and choose “FILE“. It is worth noting that we are also given the choice to export directly to our FTP server, or to our Dropbox, Google, Amazon or Microsoft drive.
Export Options overview
Let’s expand the other two drop-downs, the “Find and Replace“, as well as the “Advanced Options”
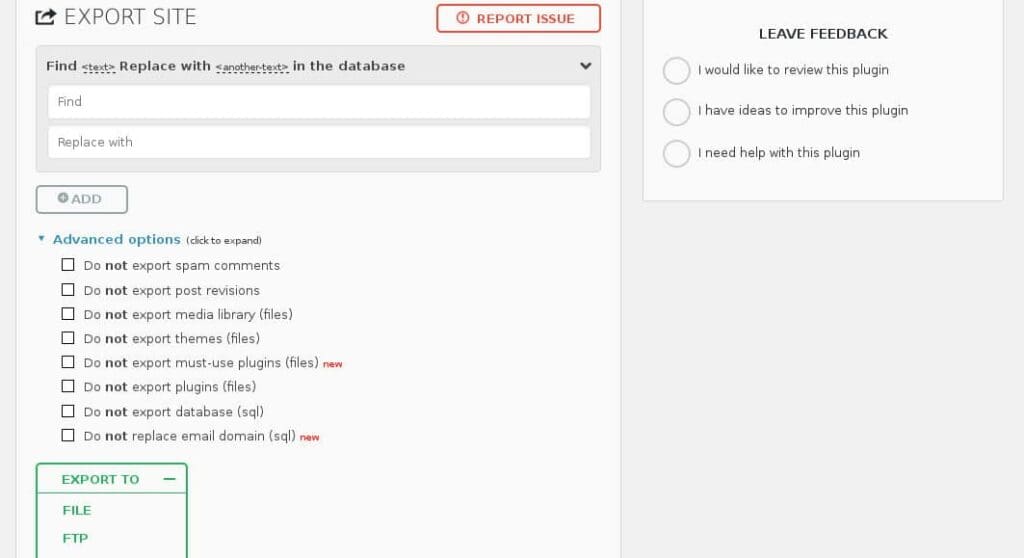
- “Find and Replace” Drop-down:
If you are just backing up your site, so that you can roll back to a previous state, you can ignore this option. However, if you are planning to migrate your existing WordPress installation to a different domain, here’s where you can safely and quickly modify all the databases references to your current domain: Simply type your current domain in the “Find” textbox (ex.www.olddomain.com) and your new domain to the “Replace with” textbox (ex.www.newdomain.com). Click on “+Add” once you are done, so that the rule takes effect. - “Advanced Options” Drop-down:
You can simply ignore all of these options with no problems, however, I have found them to be useful. WordPress saves every post, every revision and every comment in the database. If fact, even while you are still creating a post, a number of database records are automatically created every few minutes. In a very active blog, this effectively translates to thousands of records that are versions of posts, often only differing in one space or comma from one another. All this makes for a significantly bigger database. I, personally (besides keeping clean my database from revision records), always check the first two options: “Do not export spam comments” and “Do not export post revisions“
After configuring our preferred options, we can, again, expand the “EXPORT TO” drop-down and choose “FILE“.
Importing our backed up site
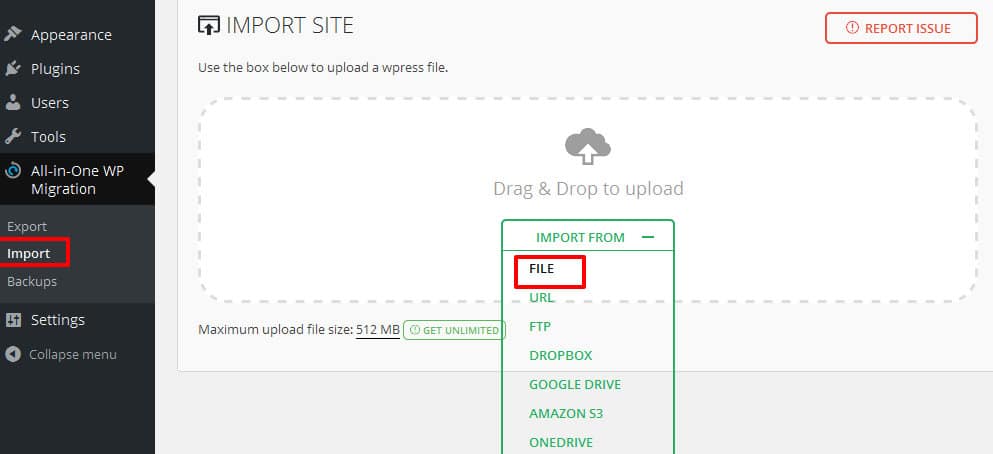
The last step is very easy. When we need to either roll back to a previous state of our site, or to migrate our WordPress installation to a new host/domain, all we have to do is go to the “IMPORT SITE” screen and choose our backup file to import
ATTENTION: This action will override ALL your content, plugins, themes and configurations, and replace them with the previously exported backup.
Thank you for reading and, please remember: It is never too soon to create a backup of your website.
Frequently Asked Questions
Is there a file size limit for imports?
The free version of All-in-One WP Migration has an import limit (typically around 512MB depending on your server). For larger sites, you can increase the upload limit via your server’s php.ini settings or purchase the premium extension for unlimited imports.
Can I use this to migrate my site to a new hosting provider?
Yes, that’s one of the plugin’s primary use cases. Install WordPress and the plugin on the new host, use the Find and Replace option to update the domain if it’s changing, and import your backup file.
Do I need to deactivate all plugins before exporting?
Not all plugins just security and caching plugins (like Wordfence, Sucuri, WP Super Cache, etc.). These can interfere with the export/import process. You can reactivate them after the backup is complete.
How often should I back up my site?
It depends on how frequently your content changes. For active blogs or stores, a weekly backup is a good practice. For less active sites, monthly backups may be sufficient. Always back up before major updates or changes.