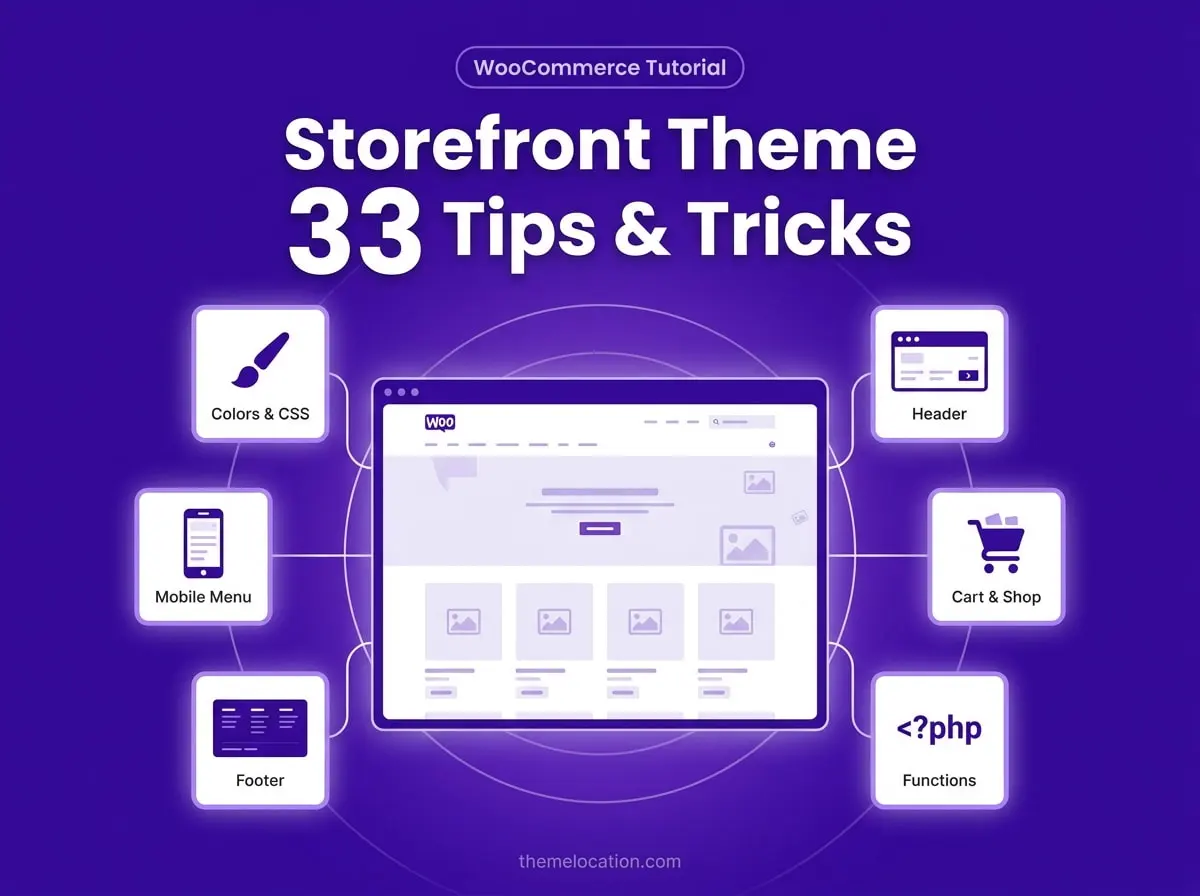
WooCommerce is one of the most popular e-commerce solutions, as it is integrated with WordPress, the content management system that powers 39.5% of the internet. As such, plenty of themes that support WooCommerce can be found, both free and premium.
And, as it always happens with WordPress themes, some are of better quality, design, code, security and frequently updated, while some others might not be up to par or break in a future WordPress core, or WooCommerce update. However, an ideal theme does exist and, what is more, it is completely free to use.
Developed by the WooCommerce core team, Storefront is a robust theme, guaranteed to always work with every next WordPress or WooCommerce update (since it is developed by the nice people of Automattic), it is responsible, tightly integrated with Woo and all the related extensions.
Storefront is based on the Underscores starter theme, making it very easily customisable for a developer, since every line of PHP and CSS code is very well commented and organized. Nevertheless, for the more casual user, it might seem a bit complex to customize and to make it unique and representative for their online store.
In this tutorial, We will share solutions for the most common modifications that will help you personalize your site.
Creating a Storefront child theme
Before we proceed with this guide, we will create a child theme for our Storefront theme. Child themes are small themes, dependent on their “parent” theme, which can override the stylesheets and custom functions of the parent theme.
This is very important, as, by creating a child theme, we can upgrade Storefront safely, without losing our custom work. To read more about child themes, check the official WordPress documentation.
A very easy way to create a child theme with a couple of clicks is to use a plugin. The Child Theme Configurator plugin can help us with this; simply download and activate the plugin and follow the wizard to create your first child theme.
Add a logo to your store
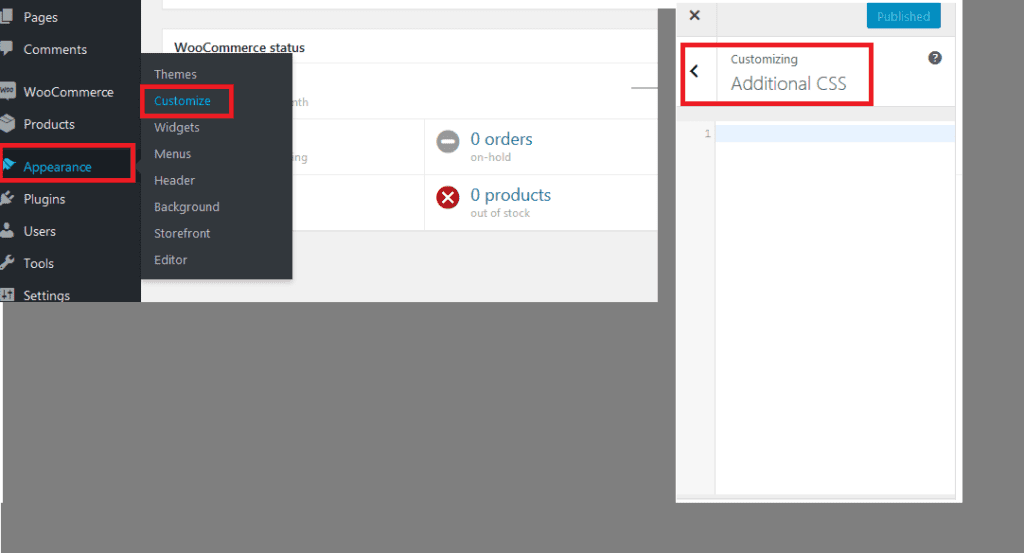
We need to use the Theme Customizer, that you can find on your dashboard under Themes > Customize. Let’s select the “Site Identity” option and upload our logo.
Storefront recommends an logo image size of 470px x 110px ; however you can upload any size you want and choose later whether you want to crop it or leave the original size. After selecting and uploading your logo click: “Publish” and you are done!
Customize header size
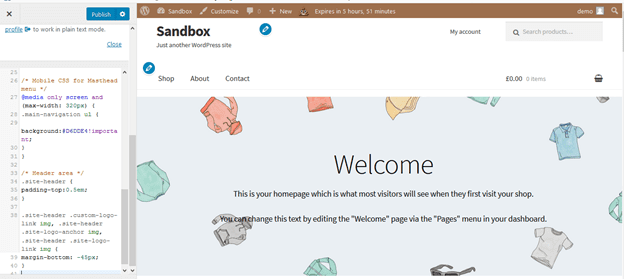
We will use again the Theme Customizer, this time we will write some CSS in the “Additional CSS” section:
Let’s add the following code:
/* Masthead */
#masthead.site-header {
height: 155px!important;
margin-bottom:0px
}
/* Mobile CSS for Masthead */
@media only screen and (max-width: 320px) {
#masthead.site-header {
height: 80px!important;
margin-bottom:0px;
}
}
/* Masthead menu */
.storefront-primary-navigation a, .cart-contents a {
margin:0 0 0 0;
}
.main-navigation ul {
padding:0 0 10px 4px!important;
}
.main-navigation li {
height:38px!important;}
/* Mobile CSS for Masthead menu */
@media only screen and (max-width: 320px) {
.main-navigation ul {
background:#D6DDE4!important;
}
}
/* Header area */
.site-header {
padding-top:0.5em;
}
.site-header .custom-logo-link img, .site-header .site-logo-anchor img, .site-header .site-logo-link img {
margin-bottom: -45px;
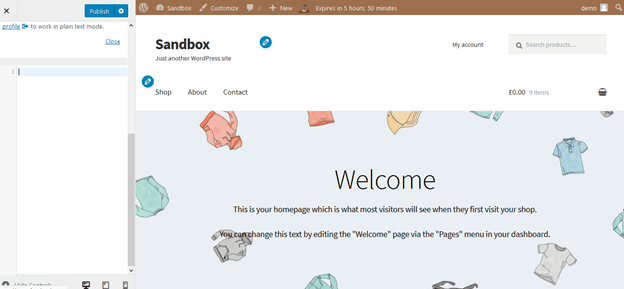
}Here is the result:
Before:
After: (We have storefront custom header)
Remove the search bar from the theme’s header:
While we are on the “Additional CSS” section of the customizer, let us add the code to hide the search bar:
.site-header .widget_product_search {
    display: none;
}
Before:

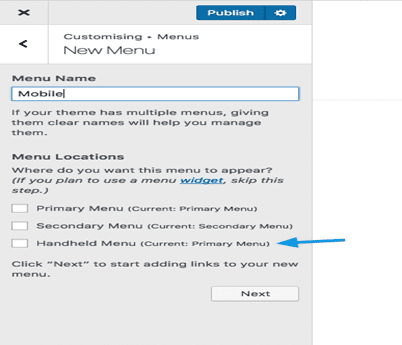
Create a separate dropdown menu for mobile devices
Storefront is a responsive theme by design; it adjust nicely to all screen sizes and, for small screens, the header menu turns to the familiar “hamburger” and displays our menu list as a dropdown.
However, what if we don’t want to use the same menu items on desktop and mobile devices? Maybe we need to direct our visitors’ attention to specific places in the website and we want them visible above the fold in a small screen.
Thankfully, Storefront and the WordPress Customizer allow us to do just that. Let’s press the back button next to “Additional CSS” (or just select Appearance > Customize from the dashboard) and select the “Menus” option. Here we can create our custom menu and assign it to only small screens by selecting the “Handheld Menu” location:
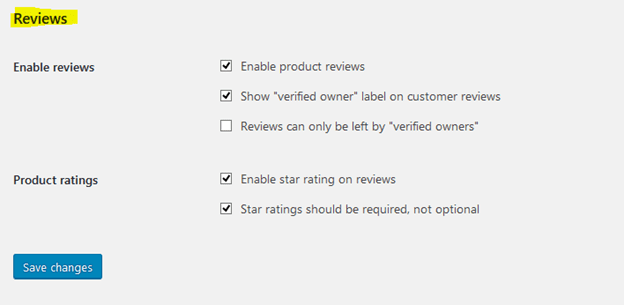
Turn off customer reviews
Customer reviews is a standard functionality of WooCommerce and Storefront, of course, has a nice design integration for reviews.
However, customer reviews are not desirable to every kind of site and e-store. To turn them off, we need to navigate to WooCommerce settings and go to the “Products” tab:

Close to the bottom of the page, we can find the “Reviews” section, where we can update our preferences regarding reviews:
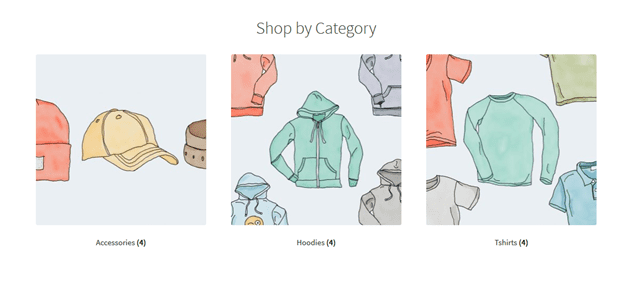
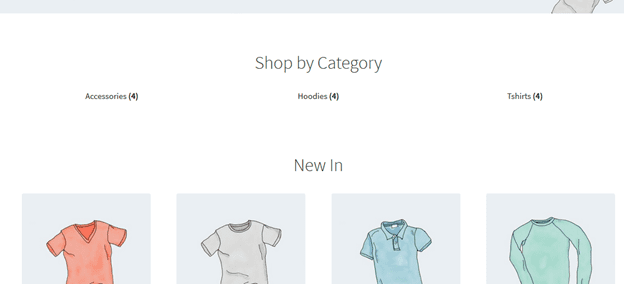
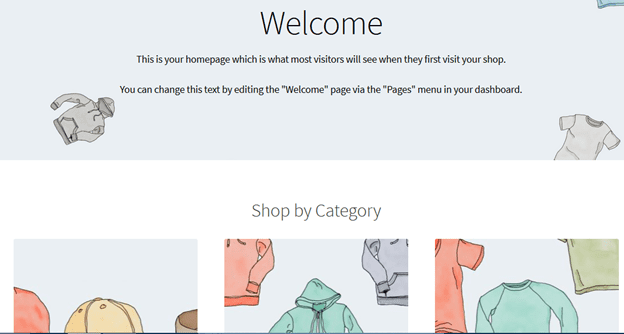
Remove product categories images from homepage
WooCommerce allows users to add images not only to products, but to product categories as well. Storefront displays these images in the homepage. This might not be the desirable behavior; we might prefer categories to be displayed as text-only.
To do this, we have to add a line in our child theme’s functions.php file. Open this file and simply add towards the end of the file the following line:
remove_action( 'woocommerce_before_subcategory_title', 'woocommerce_subcategory_thumbnail', 10 );
Here is the result:
Before:
After:
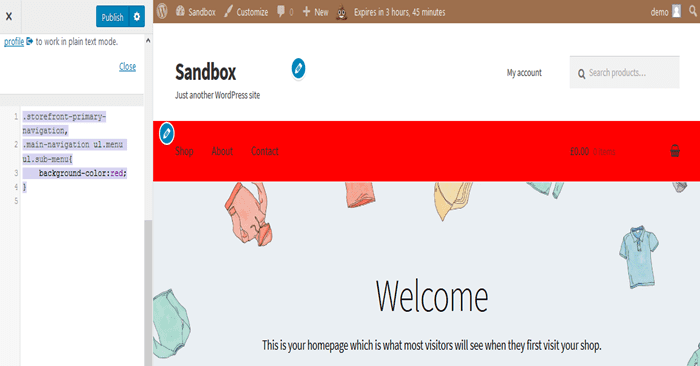
Change the header menu color
Changing the header’s background color in Storefront is very easy, as the Customizer allows us to go to Customize > Header and select the color we want.
However, this option colors the background of all the header region, including the logo, search bar and login section. What if we only want to give a different background to the header menu?
Simple. We go once more to Customizer > Additional CSS and add this line:
.storefront-primary-navigation,
.main-navigation ul.menu ul.sub-menu{
    background-color:#f0f0f0;
}
The above example gives the menu a red background color; of course we can change the color code (#f0f0f0) to the color we want.
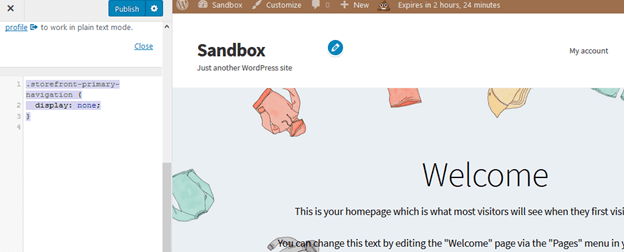
Hide primary navigation bar
If for, whichever reason, we do not want a primary navigation on the header, deleting the menu is not enough; Storefront by default displays all the pages as a menu. Always on the Customize > Additional CSS section, we add the following lines:
.storefront-primary-navigation {
  display: none;
}
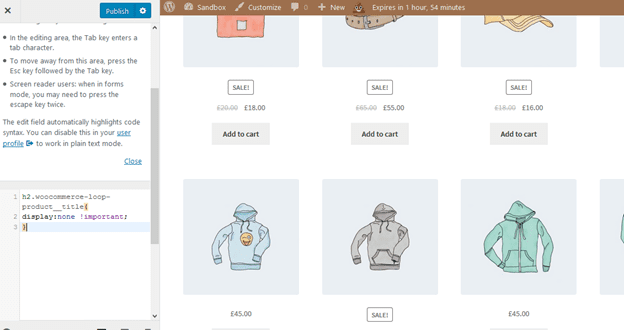
Hide products title in the shop page
In some cases, we might not need titles for our product, only an image. Again using the Customize > Additional CSS section, we add this code to hide the titles:
h4.woocommerce-loop-product__title {
    display: none !important;
}
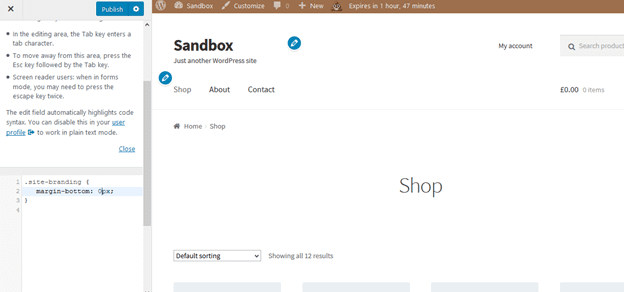
Remove blank space from the header:
Again in Customize > Additional CSS section:
.site-branding {
   margin-bottom: 0px;
}
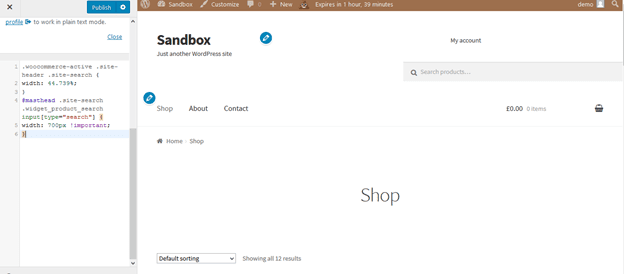
Increase the width of the search bar
We discussed above how to hide the search bar. What if we want to use the search bar, but we need a wider bar? This is again easily done in the Customize > Additional CSS section:
.woocommerce-active .site-header .site-search {
width: 44.739%;
}
#masthead .site-search .widget_product_search input[type="search"] {
width: 700px !important;
}
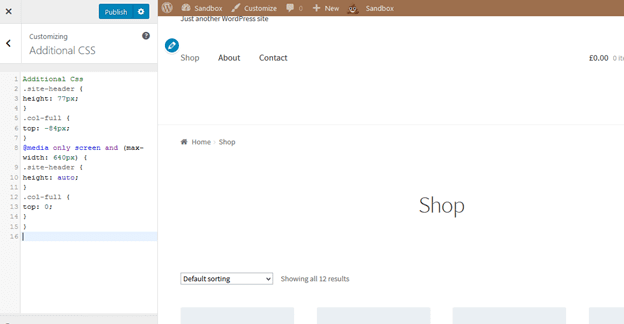
Remove space between header and menu:
In Customize > Additional CSS section:
.site-header {
    height: 77px;
}
.col-full {
    top: -84px;
}
@media only screen and (max-width: 640px) {
    .site-header {
        height: auto;
    }
    .col-full {
        top: 0;
    }
}
Adding extra text to WooCommerce Registration Page
Suppose we want to add a “Thank you”, or promote our email list, or offer discount vouchers for our new registrants. A great option would be to add a message in the registration page.
To achieve this, we need to add a function in our child theme’s functions.php file:
add_action( 'bp_signup_profile_fields', function() {
// Start editing below.
?>
<p class="notice-check-inbox">
Please remember to check your emails and confirm registration for a
<strong>10% discount voucher</strong>!
</p>
<?php
// End editing.
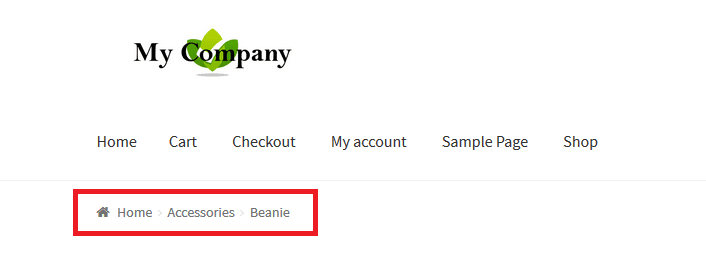
} );Remove breadcrumbs in Storefront theme
Breadcrumbs (see image below) is a compact navigation on the top of each page that shows the category to which the page, or product in this case, belongs. They are great for search engine optimization, however we might not want to use this functionality.
To remove breadcrums, we will add a filter in our child theme’s functions.php file:
add_filter( 'woocommerce_get_breadcrumb', '__return_false' );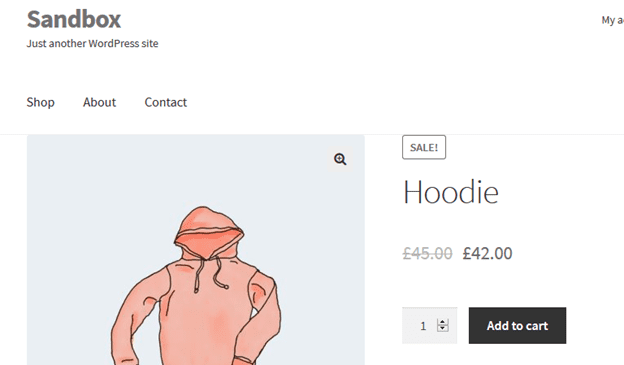
Change the URL link in the logo
Storefront and WordPress themes in general, link the site’s homepage in the logo, by default. This is standard in user experience, and users expect to be able to go back to the homepage every time they click on the logo.
However, there are occasions that we want a custom link for our logo. For instance, if we use a landing page, product or promotion page and the actual homepage is on a different location.
To change this default behavior, we need to do add the following code in our child theme’s functions.php file:
add_action( 'storefront_header' , 'custom_storefront_header', 1 );
function custom_storefront_header () {
    remove_action( 'storefront_header' , 'storefront_site_branding', 20 );
    add_action( 'storefront_header' , 'custom_site_branding', 20 );
    function custom_site_branding() {
        // HERE set the link of your logo or site title
        $link = home_url( '/my-custom-link/' );
        ?>
        <div class="site-branding">
            <?php
                if ( function_exists( 'the_custom_logo' ) && has_custom_logo() ) {
                    $custom_logo_id = get_theme_mod( 'custom_logo' );
                    if ( $custom_logo_id ) {
                        $custom_logo_attr = array('class' => 'custom-logo', 'itemprop' => 'logo' );
                        $image_alt = get_post_meta( $custom_logo_id, '_wp_attachment_image_alt', true );
                        if ( empty( $image_alt ) ) {
                            $custom_logo_attr['alt'] = get_bloginfo( 'name', 'display' );
                        }
                        $logo = sprintf( '<a href="%1$s" class="custom-logo-link" rel="home" itemprop="url">%2$s</a>',
                            esc_url( $link ),
                            wp_get_attachment_image( $custom_logo_id, 'full', false, $custom_logo_attr )
                        );
                    }
                    elseif ( is_customize_preview() ) {
                        $logo = sprintf( '<a href="%1$s" class="custom-logo-link" style="display:none;"><img class="custom-logo"/></a>', esc_url( $link ) );
                    }
                    $html = is_front_page() ? '<h1 class="logo">' . $logo . '</h1>' : $logo;
                } elseif ( function_exists( 'jetpack_has_site_logo' ) && jetpack_has_site_logo() ) {
                    $logo    = site_logo()->logo;
                    $logo_id = get_theme_mod( 'custom_logo' );
                    $logo_id = $logo_id ? $logo_id : $logo['id'];
                    $size    = site_logo()->theme_size();
                    $html    = sprintf( '<a href="%1$s" class="site-logo-link" rel="home" itemprop="url">%2$s</a>',
                        esc_url( $link ),
                        wp_get_attachment_image( $logo_id, $size, false, array(
                            'class'     => 'site-logo attachment-' . $size,
                            'data-size' => $size,
                            'itemprop'  => 'logo'
                        ) )
                    );
                    $html = apply_filters( 'jetpack_the_site_logo', $html, $logo, $size );
                } else {
                    $tag = is_front_page() ? 'h1' : 'div';

                    $html = '<' . esc_attr( $tag ) . ' class="beta site-title"><a href="' . esc_url( $link ) . '" rel="home">' . esc_html( get_bloginfo( 'name' ) ) . '</a></' . esc_attr( $tag ) .'>';

                    if ( '' !== get_bloginfo( 'description' ) ) {
                        $html .= '<p class="site-description">' . esc_html( get_bloginfo( 'description', 'display' ) ) . '</p>';
                    }
                }
                echo $html;
            ?>
        </div>
        <?php
Our custom URL goes to the line 7: $link = home_url( '/my-custom-link/' );; just replace “my-custom-link” with your actual link
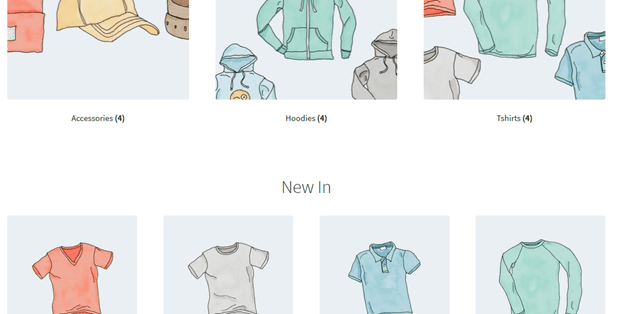
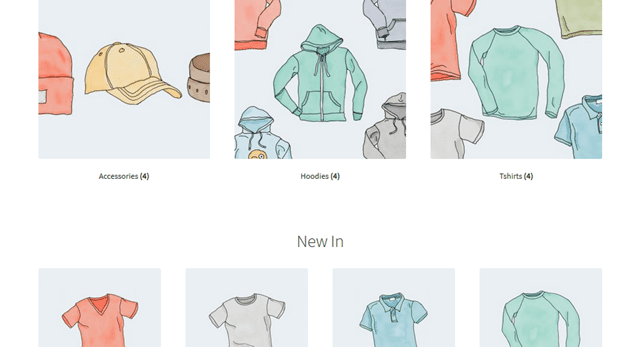
Completely remove categories from the store page
Again in our functions.php file, we add the following function:
function storefront_child_reorder_homepage_contant() {
    remove_action('homepage', 'storefront_product_categories', 20 );
}
add_action('init', 'storefront_child_reorder_homepage_contant');
Here is the result:
Before:
After:
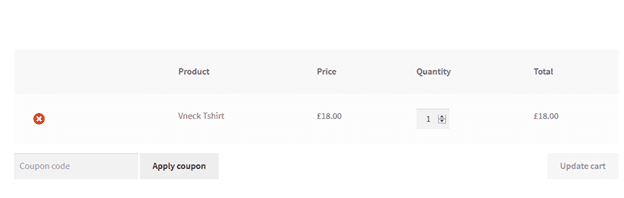
Remove product image from cart and mini-cart.
In our child theme’s functions.php file, we add the following filter:
add_filter( 'woocommerce_cart_item_thumbnail', '__return_false' );Here is the result:
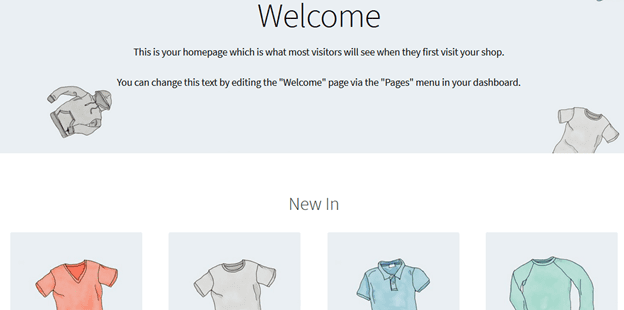
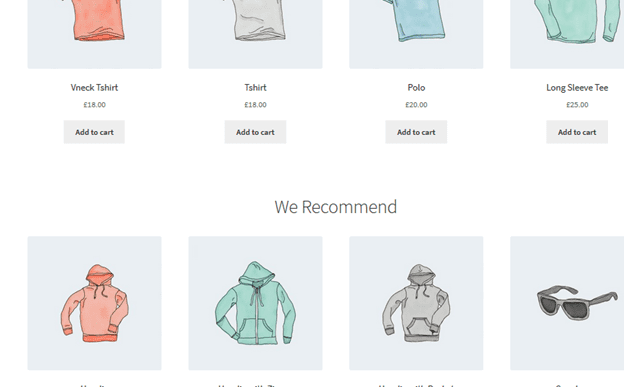
Recent products from our the shop’s page
Storefront, by default, allows us to most recent products that were added to our store in our shop’s front page
However, this might clutter the shop page, if we change our products frequently, or if we prefer to display different information. Here is how to remove this feature:
In our child theme’s functions.php file, we add the following function:
function storefront_child_reorder_homepage_contant() {
    remove_action('homepage', 'storefront_recent_products', 30 );
}
add_action('init', 'storefront_child_reorder_homepage_contant');
Here is the result:

Remove best-selling products from store page
Another feature of Storefront that might not be desirable, is to display the best selling products.
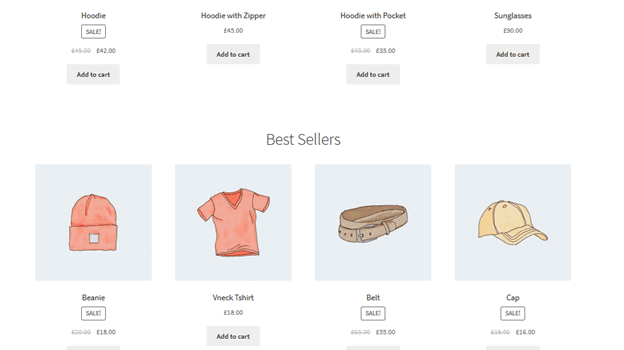
To disable this feature, in our child theme’s functions.php file, we add the following function:
function storefront_child_reorder_homepage_contant() {
    remove_action('homepage', 'storefront_best_selling_products', 70 );
}
add_action('init', 'storefront_child_reorder_homepage_contant');
And here is the result after removing the best selling products feature:
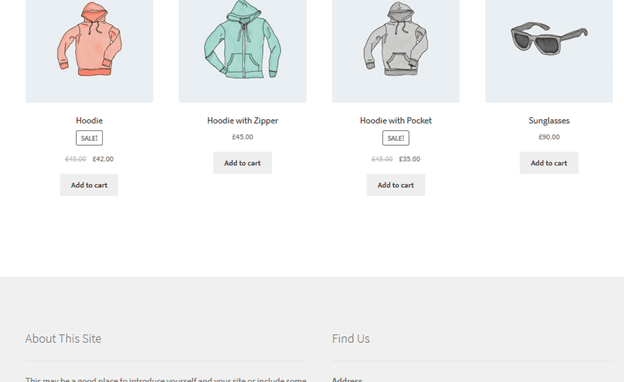
Remove featured products
In the same vain, we might want to disable feature that displays the featured products. We need to add the following function in our child theme’s functions.php file:
function storefront_child_reorder_homepage_contant() {
    remove_action('homepage', 'storefront_featured_products', 40 );
    }
add_action('init', 'storefront_child_reorder_homepage_contant');
Here is the result:
Before:
After:
Integrate a sticky “Add to cart” button
For some products, the description, image gallery, and additional information might result to a long page.
Instead of forcing the customer to scroll back up to the top of the page in order to add the product to cart, we could instead have a sticky “Add to cart” button on the top of the screen.
This is very easily accomplished with the Storefront Sticky Add to Cart plugin. The plugin does not need any configuration, simply install and activate it, and enjoy sticky “Add to cart” buttons on all your product pages.

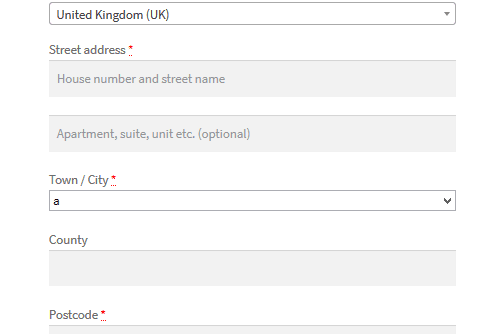
Add a dropdown list of cities on Checkout page
The following function will allow us to have a dropdown list of cities to your Checkout page. This will help our customers to fill in more quickly their personal data; it can also enable us to only make available the cities to where we ship our products.
This is the function we will add in our child theme’s functions.php file:
add_filter( 'woocommerce_default_address_fields', 'override_checkout_city_fields', 10, 1 );
function override_checkout_city_fields($fields) {
 // Define here in the array your desired cities (Here an example of cities)
    $option_cities = array(
        '' => __( 'Select your city' ),
        'a' => 'a',

    );

    $fields['city']['type'] = 'select';
    $fields['city']['options'] = $option_cities;

    return $fields;
}
In the fifth line of the above code, we define our list of cities. The first part of the code 'a' => is the city’s ID, that cannot include spaces or empty characters, ex. 'london'.
In contrast, on the second part of the code we write the name of the city the exact way we want it displayed, with capitalization, spaces if necessary, etc. Example, => 'London City',. We can add as many elements to the list as we want.
Hide the product quantity plus and minus buttons from product page
To hide the text field with the plus and minus buttons to increase or decrease product quantity, all we have to do is to add the following rule in the “Appearance > Customize > Additional CSS” section:
.quantity {
    display: none !important;
}
Here is the result:

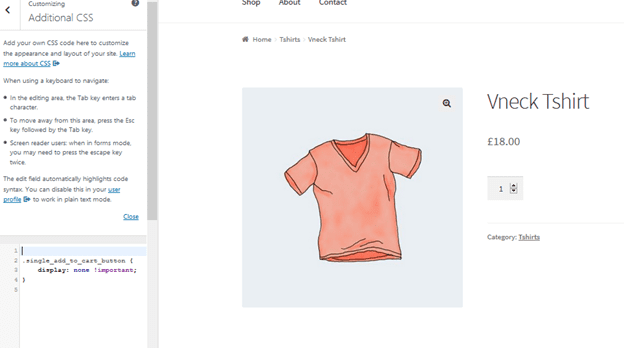
Hide “Add to cart” button on product page
If for any reason we need to hide the “Add to cart” buttons, we simply add the following CSS rule in the “Appearance > Customize > Additional CSS” section:
.single_add_to_cart_button {
    display: none !important;
}
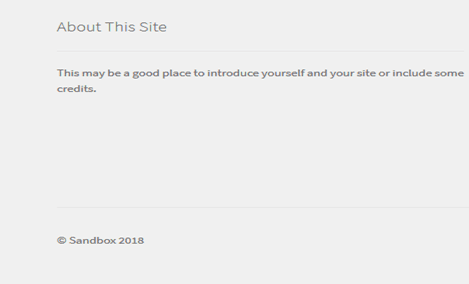
Remove Storefront theme credit from footer
To remove the Storefront credit in the footer, we need to add the following function in our child theme’s functions.php file:
add_action( 'init', 'custom_remove_footer_credit', 10 );
function custom_remove_footer_credit () {
remove_action( 'storefront_footer', 'storefront_credit', 20 );
add_action( 'storefront_footer', 'custom_storefront_credit', 20 );
}
function custom_storefront_credit() {
?>
<div class="site-info">
© <?php echo get_bloginfo( 'name' ) . ' ' . get_the_date( 'Y' ); ?>
</div><!-- .site-info -->
<?php
}Here is the result:
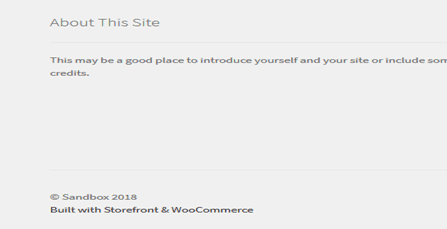
After:
Change storefront widget section color and font size
The Customizer does not give a direct way to change font color or size for the page widgets. Nevertheless, it is very easy to change it to whatever we want, with adding the following CSS rules in the “Appearance > Customize > Additional CSS” section:
.widget-area .widget {
    color: red;
    font-size: 1em;
}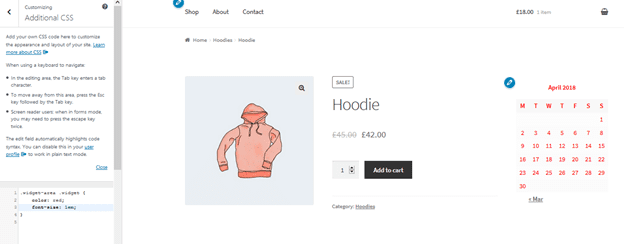
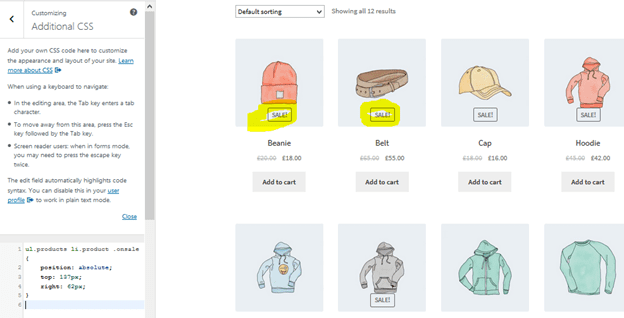
Show Storefront “Sale” badge on product image
WooCommerce allows us to define a “sales”, or discounted price for certain products. Those products are automatically marked with a “Sale” badge.
Here is how to move the “Sale” badge to be displayed on the product image, rather than on the text description:
In the “Appearance > Customize > Additional CSS” section we add the following rule:
ul.products li.product .onsale {
    position: absolute;
    top: 137px;
    right: 62px;
}
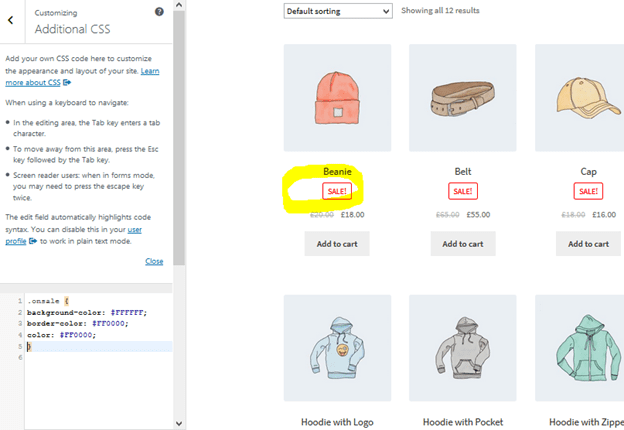
Change the color of the “Sale” badge
To change the color of the “Sale” badge, let’s add the following rule in our “Appearance > Customize > Additional CSS” section:
.onsale {
    background-color: #FFFFFF;
    border-color: #FF0000;
    color: #FF0000;
}
Change quantity “plus-minus” box color
Here is a simple CSS rule to change the background color of the quantity plus and minus buttons:
.quantity .qty {
    color: #000;
    background-color: #f5df72;
}
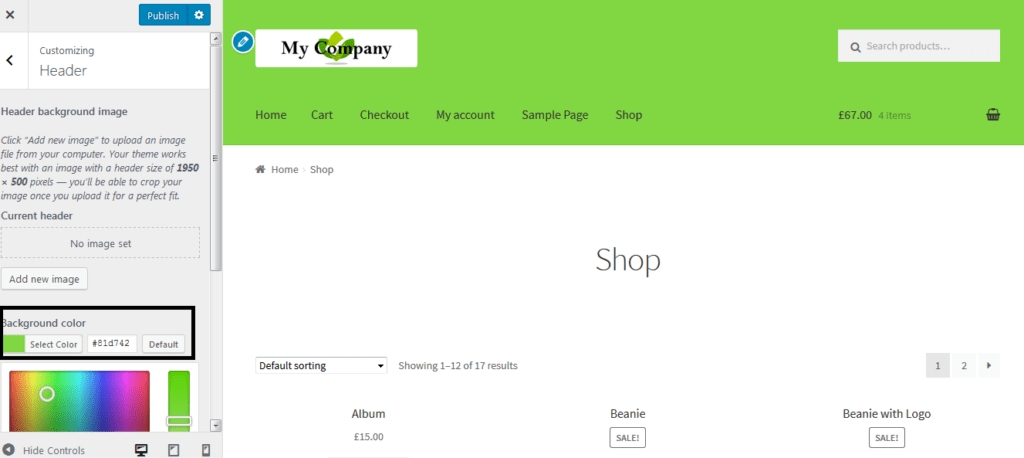
How to change the background color of the Storefront header
If we need to change the background color of Storefront theme’s header, the WordPress Customizer gives us a very easy way to do this:
We go to “Appearance > Customizer > Header” and we select the color we want in the “Background Color” section
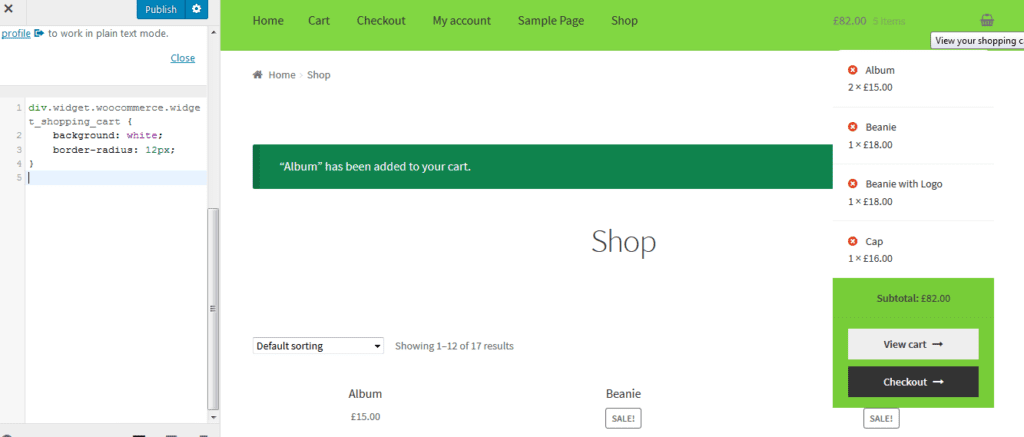
Change the background color of the minicart on the header
When we follow the above way to change the theme’s header background color, we notice that the minicart dropdown inherits the header’s background color.
This might not be desirable, as the minicart contents might not be readable with the header’s background color.
With the following CSS rule, we can change the minicart background color to anything we want (regardless of the header color):
.woocommerce.widget_shopping_cart {
    background: white;
    border-radius: 12px;
}
Add Image in Storefront Footer Using CSS Below Copyright?
Inserting images in the storefront footer is crucial if you want to display a small logo, accepted payments, download link, or partner badge below the copyright text.
Steps:
1. Head over to LAYERS → CUSTOMIZE, then, Click on FOOTER.
2. After that, Click on CUSTOMIZATION to expand the panel and click on Select Image in the Background Image option.
3. Select the image you want to use and click USE IMAGE.
4. Then, Select No Repeat and Bottom, which will center your image in the footer text area.
But if you still want to adjust the position of your image manually;
5. Click the back button in the Customizer nav
6. Then, click CSS to expand the panel.
7. After that, enter the following:
.site-info:after {
    content: '';
    background-image: url(https://20k28w1i5xtz152fd42li172-wpengine.netdna-ssl.com/wp-content/uploads/2017/11/Pocket-Squares.jpg);
    display: block;
    width: 100px;
    height: 100px;
    margin: 0 auto;
}
Then, ensure you adjust the percentages of the image as desired, and in line with the copyright text.