
To change the color of WooCommerce buttons, you need to override the default CSS styles that WooCommerce applies to its buttons. The cleanest way to do this is by adding custom CSS to your WordPress site either through a plugin or directly in your theme.
There are two ways to do this:
- Add the custom CSS in your theme’s style.css
- Use a plugin to inject the custom CSS into your web pages
I recommend the plugin approach for most store owners. It’s safer, doesn’t require FTP access, and your changes won’t get wiped out during a theme update.
Method 1: Using a Plugin (Recommended)
We will use a WordPress plugin to inject the CSS into your WooCommerce pages. The plugin I recommend is Simple Custom CSS — it’s free, lightweight, and does exactly what we need.
You can download it here: Simple Custom CSS
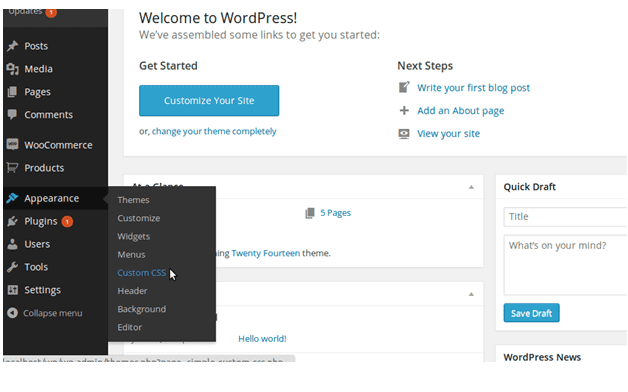
Step 1: Install and activate the plugin on your WordPress site, then go to Appearance > Custom CSS in your dashboard.
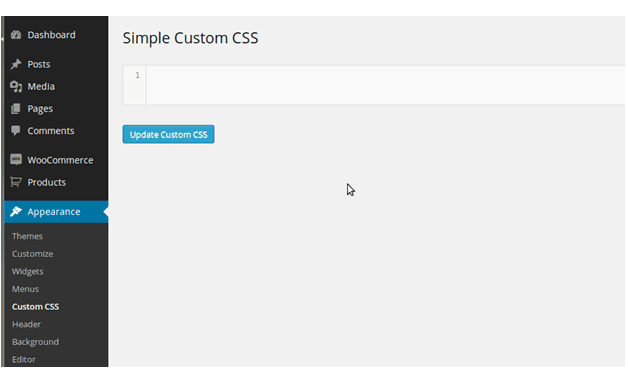
Step 2: Paste the following CSS into the text area and click “Update Custom CSS”:
.woocommerce #content input.button.alt:hover,
.woocommerce #respond input#submit.alt:hover,
.woocommerce a.button.alt:hover,
.woocommerce button.button.alt:hover,
.woocommerce input.button.alt:hover,
.woocommerce-page #content input.button.alt:hover,
.woocommerce-page #respond input#submit.alt:hover,
.woocommerce-page a.button.alt:hover,
.woocommerce-page button.button.alt:hover,
.woocommerce-page input.button.alt:hover {
    background: red !important;
    background-color: red !important;
    color: white !important;
    text-shadow: transparent !important;
    box-shadow: none;
    border-color: #ca0606 !important;
}

.woocommerce #content input.button:hover,
.woocommerce #respond input#submit:hover,
.woocommerce a.button:hover,
.woocommerce button.button:hover,
.woocommerce input.button:hover,
.woocommerce-page #content input.button:hover,
.woocommerce-page #respond input#submit:hover,
.woocommerce-page a.button:hover,
.woocommerce-page button.button:hover,
.woocommerce-page input.button:hover {
    background: red !important;
    background-color: red !important;
    color: white !important;
    text-shadow: transparent !important;
    box-shadow: none;
    border-color: #ca0606 !important;
}

.woocommerce #content input.button,
.woocommerce #respond input#submit,
.woocommerce a.button,
.woocommerce button.button,
.woocommerce input.button,
.woocommerce-page #content input.button,
.woocommerce-page #respond input#submit,
.woocommerce-page a.button,
.woocommerce-page button.button,
.woocommerce-page input.button {
    background: red !important;
    color: white !important;
    text-shadow: transparent !important;
    border-color: #ca0606 !important;
}

.woocommerce #content input.button.alt:hover,
.woocommerce #respond input#submit.alt:hover,
.woocommerce a.button.alt:hover,
.woocommerce button.button.alt:hover,
.woocommerce input.button.alt:hover,
.woocommerce-page #content input.button.alt:hover,
.woocommerce-page #respond input#submit.alt:hover,
.woocommerce-page a.button.alt:hover,
.woocommerce-page button.button.alt:hover,
.woocommerce-page input.button.alt:hover {
    background: red !important;
    box-shadow: none;
    text-shadow: transparent !important;
    color: white !important;
    border-color: #ca0606 !important;
}
Now go to your WooCommerce product page or cart page, you’ll see all buttons in red.
To use your own color: Replace every instance of background: red !important and background-color: red !important with your desired color. You can use any valid CSS color value — a hex code like #ff6600, an RGB value like rgb(255, 100, 0), or a color name like blue. Also update the border-color value to match or complement your button color.
Click Update and you’re done.
Method 2: Using the WordPress Additional CSS (No Plugin Needed)
If you’d rather not install another plugin, WordPress has a built-in option for adding custom CSS and it works just as well for this.
- Go to Appearance > Customize in your WordPress dashboard.
- Click on “Additional CSS” at the bottom of the left panel.
- Paste the same CSS from above into the text area.
- Click Publish to save.
Your button colors will update immediately, you can even preview the changes live in the Customizer before saving.
Method 3: Adding CSS Directly to style.css
If you’re comfortable with file editing and you’re using a child theme, you can also add the CSS directly to your child theme’s style.css file.
- Go to Appearance > Theme File Editor
- Select your child theme’s style.css file
- Scroll to the bottom and paste the CSS
- Click Update File
Only do this if you have a child theme. Adding CSS to a parent theme’s style.css will be overwritten the next time the theme updates.
Wrapping Up
Changing WooCommerce button colors is a straightforward CSS customization that any store owner can do, no developer needed. Here’s a quick recap:
- Easiest (no plugin): Use Appearance > Customize > Additional CSS
- Most reliable (theme-independent): Use the Simple Custom CSS plugin
- For developers with a child theme: Add directly to style.css
In all cases, just replace red in the CSS with your brand color and you’re good to go. If you need help customizing your WooCommerce store beyond button colors, layout changes, checkout customization, or anything else our team at Themelocation is always happy to help.