Online store owners might need custom checkout fields for a variety of reasons. For instance, several retailers might want to provide an option for buyers to purchase an item as a gift for someone else.
In this case, the same retailers might want to provide a variety of gift-wrapping and dedication options which would provide convenience for the gift buyer.
There may also be other applications, such as for a pizza or virtually any other delivery service. A text area can be added where customers can make special requests and instructions or where users can provide directives for deliveries to be made at a specific time and place.
All these and any other useful information under the sun can be communicated by the customers to online store owners using additional fields in the checkout page.
In this tutorial, you will learn how to add extra fields in the WooCommerce checkout page. We will explore and provide the code that you can use as a guide to effectively utilize custom fields to gain additional information from your customers during the checkout process.
To add custom field, We will follow two approaches such as:
- Plugin
- Code
1- Custom WooCommerce Checkout Fields Editor
The easiest way to customize your WooCommerce checkout page. See all the existing used fields for the Checkout, Shipping, and Account sections, add new ones, edit them and re-arrange their order.
This plugin is designed with those of you in mind, who want to request more information from your WooCommerce checkout page, give additional options to your customers and do not want to spend a fortune for a custom-coded solution.
Create new fields with a few clicks of the mouse
Change the order of the fields at will
Edit, change field type or deactivate default WooCommerce fields
Features:
- Create new fields on Checkout, Shipping, and Account sections.
- Create additional fields that display after Order Notes.
- Edit, remove or disable fields created with this plugin, or standard WooCommerce fields.
- Change the “required” status of any field.
- All fields, even the default WooCommerce ones, are editable with this plugin.
- Field types:
- Text
- Password
- Hidden
- Textarea
- File Upload
- Select
- Multi-Select
- Checkbox
- Radio Button
- Date Picker
- Heading
- Fields spanning across the full row or half a row.
- Add custom class to any new or existing field.
- Choose which fields are displayed in the order email notification.
- Choose which fields are displayed in the “Order Details” page.
- Labels and placeholders for fields.
- Select allowed filetypes for upload fields.
- Reset all custom fields and fallback to default.
Quick start:
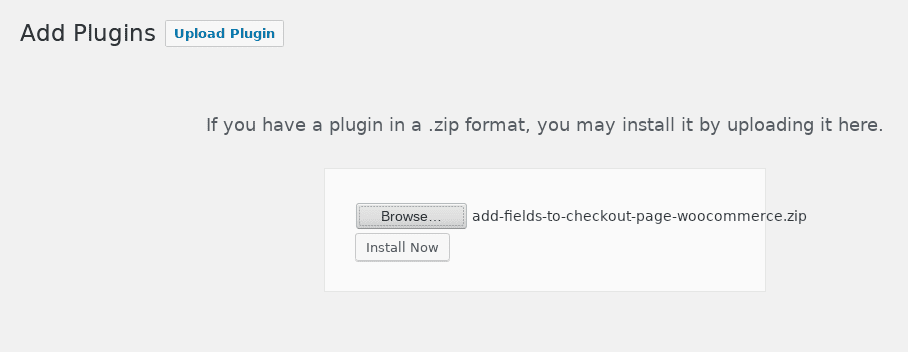
1. Upload and activate the “Custom WooCommerce Checkout Fields Editor” zip file.
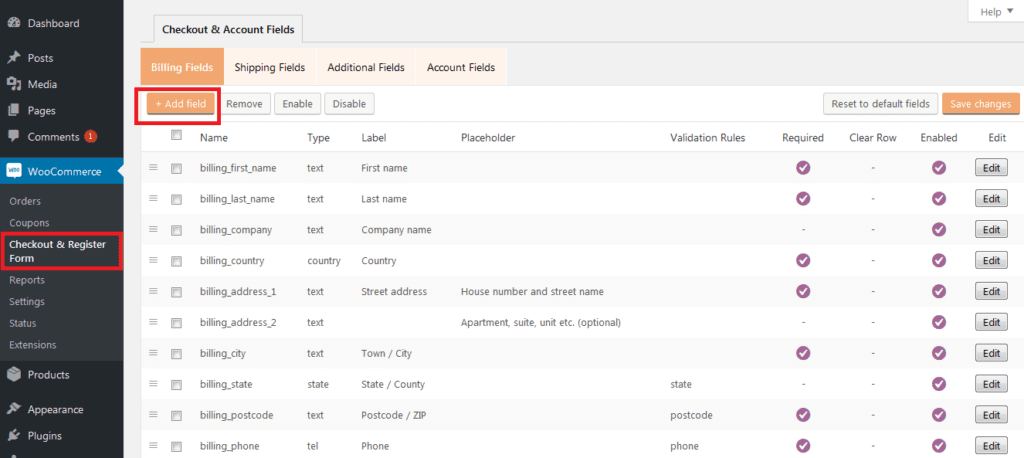
2. Go to WooCommerce > Checkout & Register Form:
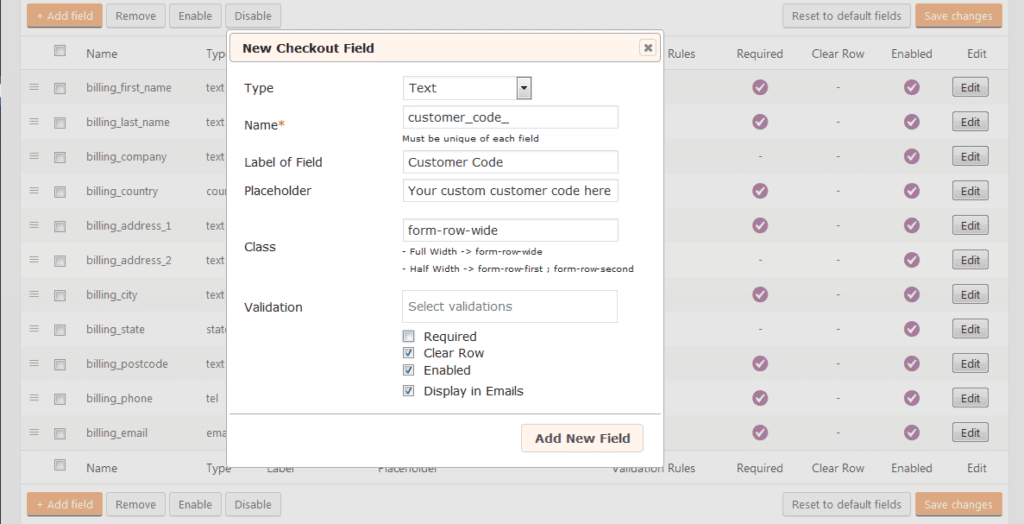
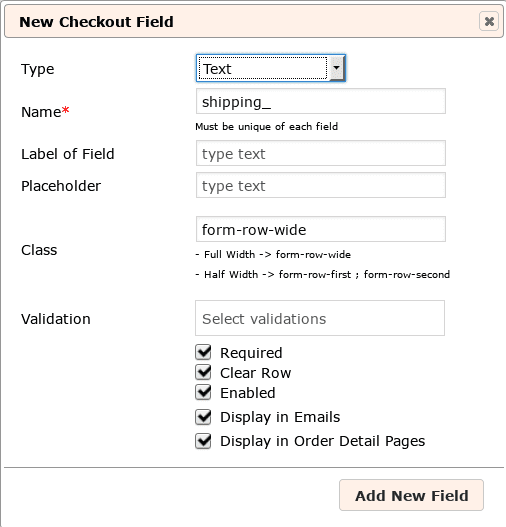
3. Add a custom “Text” field:

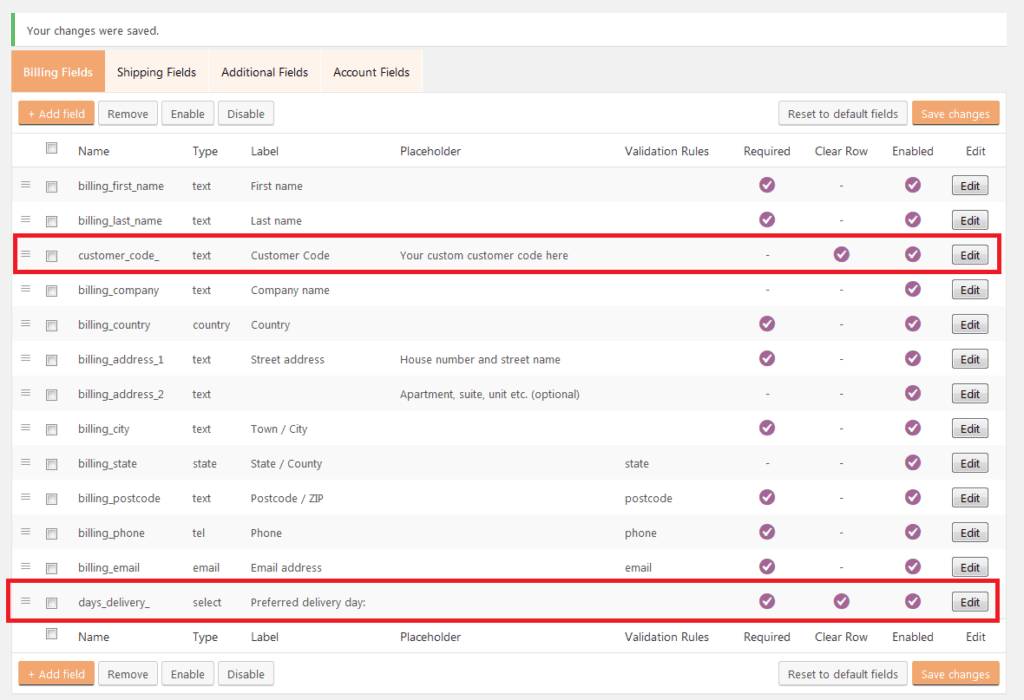
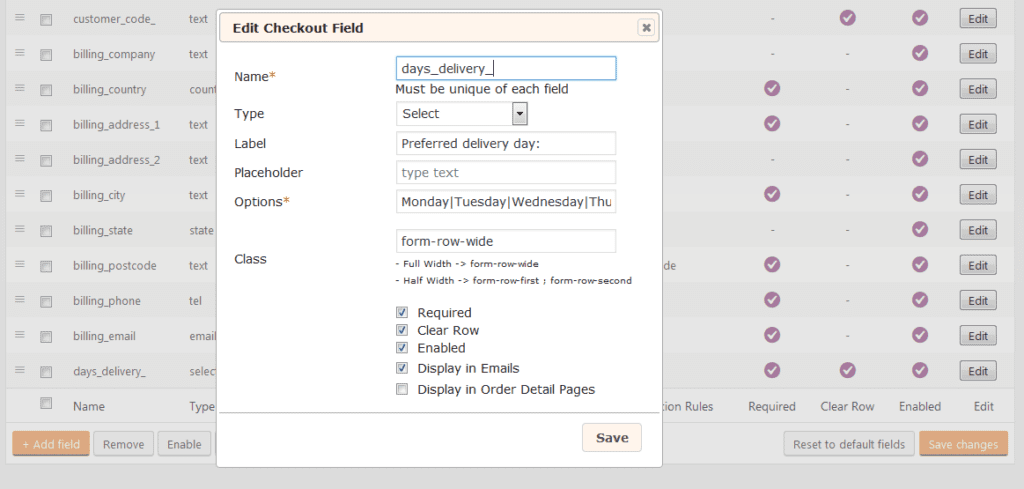
4. Add a custom “Select” field:
5. Save changes and re-arrange fields with drag-and-drop:

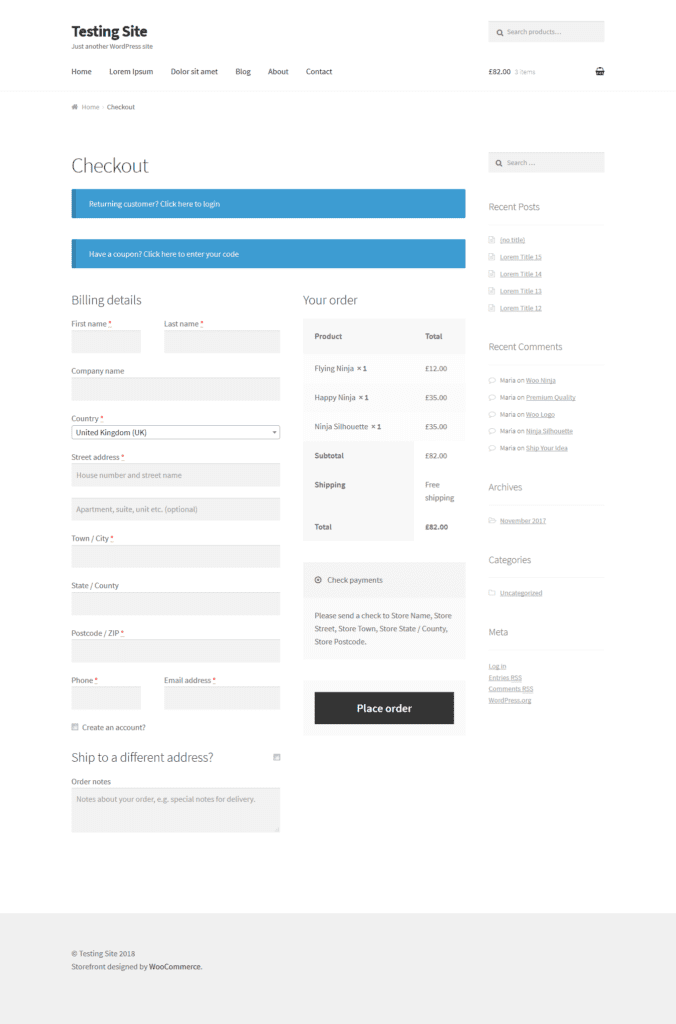
6. Your checkout page with custom fields is ready!
Options:
Type
Choose the field type.
- Text: Text input field for any text strings (names, city name, etc).
- Password: Password input – input characters are masked.
- Hidden: Adds a hidden field.
- Textarea: A multiline text area input for longer messages.
- File Upload: Allows users to upload files.
- Select: Dropdown options. Requires to set the options with a pipe
|separator. - Multi-select: Dropdown multiple choice options. Requires to set the options with a pipe
|separator. - Checkbox: Select multiple options with a checkbox. Requires to set the options with a pipe
|separator. - Radio Button: Select single option by checking a radio button. Requires to set the options with a pipe
|separator. - Date picker: Datepicker to select a date.
- Heading: Add a custom heading to a section.
Name
The unique name of the field.
Label
The label of the field, displayed on the front-end.
Placeholder
A short text shown on the field that disappears when the user begins to type. Usually contains a hint on the expected value of the field.
Class
- Row class: Can be one of two values:
form-row-wide, if we want the field to span across the full width of the column, orform-row-firstorform-row-second, if we want the field to occupy half of the columns width.
- Custom class: Add your custom class here for CSS styling.
Misc Options
- Required: Toggle this option if you want the field to be mandatory to complete, before the user submits the form.
- Clear Row: The row clears after the field is displayed and the next field starts on a new row.
- Enabled: Toggle this to make the field visible on the front-end.
- Display in Emails: Toggle this to send the field value with the order email.
- Display in Order Detail Pages: Toggle this to make the field visible in the order detail page.
2- Custom Code:
To start integrating custom fields, we should make the necessary modifications on the theme functions.php file. The easiest way to do this is by navigating to Appearance > Editor, then looking for Theme Functions (functions.php) on the right-hand side.
/**
* Add the field to the checkout page
*/
add_action( 'woocommerce_after_order_notes', 'tl_some_custom_checkout_field' );
tl_some_custom_checkout_field( $checkout ) {
echo '<div id="some_custom_checkout_field"><h2>' . __('Heading') . '</h2>';
woocommerce_form_field( 'some_field_name', array(
'type' => 'text',
'class' => array('my-field-class form-row-wide'),
'label' => __('Additional Field'),
'placeholder' => __('Some hint'),
'required' => true,
), $checkout->get_value( 'some_field_name' ));
echo '</div>';
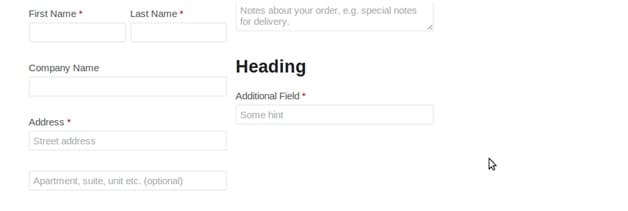
}The code above adds a function which generates the code for the additional form field and adds a corresponding action which will call the function after the WooCommerce order notes section. It is worth noting that the code above does not merely include an input element but also a heading element which can serve as a good placeholder for the your new section of custom fields.
As you can see in the screenshot below, adding this code would generate a custom-made form field similar to the rest of your checkout form. The newly-added code generated by the function appears right as expected, after the order notes field.
/**

Enabling validation of additional fields

While the current setup looks okay, it is important that the additional fields work properly just like the rest of the checkout form. For this to happen, further adjustments should be made to the functions.php file.

For instance, the following code below would ensure that the customer would input a valid value for the additional custom fields that we have added. This is to prevent the user from skipping required custom fields which may contain essential information for the order to be processed properly.

* Process the checkout

*/

add_action(‘woocommerce_checkout_process’, ‘tl_some_custom_checkout_field_process’);

tl_some_custom_checkout_field_process() {

// if the field is set, if not then show an error message.

if ( ! $_POST[‘some_field_name’] )

wc_add_notice( __( ‘Please enter value.’ ), ‘error’ );

}
Saving the information to the database
Now that the needed code for the proper validation of input is in place, the last step in adding a custom field to the checkout page is to ensure that the additional information that the users input are promptly and securely saved in the WordPress database.
This entire procedure would be useless without your ability to retrieve the data your customers have entered into the custom fields you have added, so this piece of the code is very crucial. Don’t forget it!
/**

* Update the order meta with field value

*/

add_action( ‘woocommerce_checkout_update_order_meta’, ‘tl_some_custom_checkout_field_update_order_meta’ );

tl_some_custom_checkout_field_update_order_meta( $order_id ) {

if ( ! empty( $_POST[‘some_field_name’] ) ) {

update_post_meta( $order_id, ‘Some Field’, sanitize_text_field( $_POST[‘some_field_name’] ) );

}

}
With this code, the customer’s additional information will be now saved once an order is placed.